between quarantine and raising 13-month-old twins, we have spent more time in our home in the last year than we have in the entire three years we’ve lived here. all that time inside can make you go insane entertain home improvement projects you had long since put off for another day. besides eventually redoing our primary shower and upgrading some kitchen appliances, “redesign our walk-in closet” seemed like the most feasible item to tackle first.
for that we turned to good ol’ ikea! with S’s handiness and the affordability of ikea’s customizable systems, we knew the entire project would be fairly painless in both man power and budget.
before i break it all down, i’ll have you know that S did his side of the closet first as sort of a “test run” before moving onto my portion. in all honesty i was a little apprehensive to start my side because i didn’t quite have a clear idea of the configuration i desired. i’m still rebuilding my wardrobe in this post-postpartum season so i wasn’t sure of the storage capacity i’d need. after perusing pinterest for design inspiration, i came across this image and fell in love. we ultimately opted to ditch the doors (our closet is fairly narrow and wouldn’t accommodate them), but used the cubbies as the focal point of which to build around.
ikea’s website makes it pretty easy (i say this as someone who had S do everything) to create your desired design, taking the room’s measurements into consideration along the way. we moved things around a few times before finally landing on the below configuration:
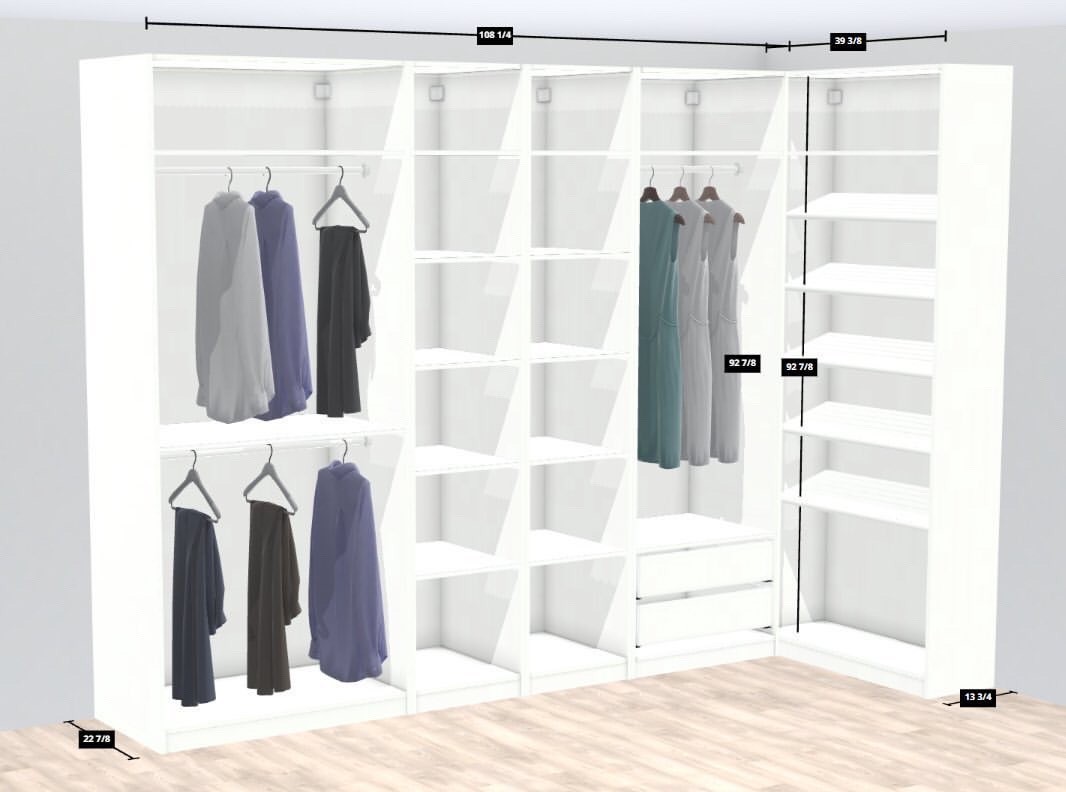
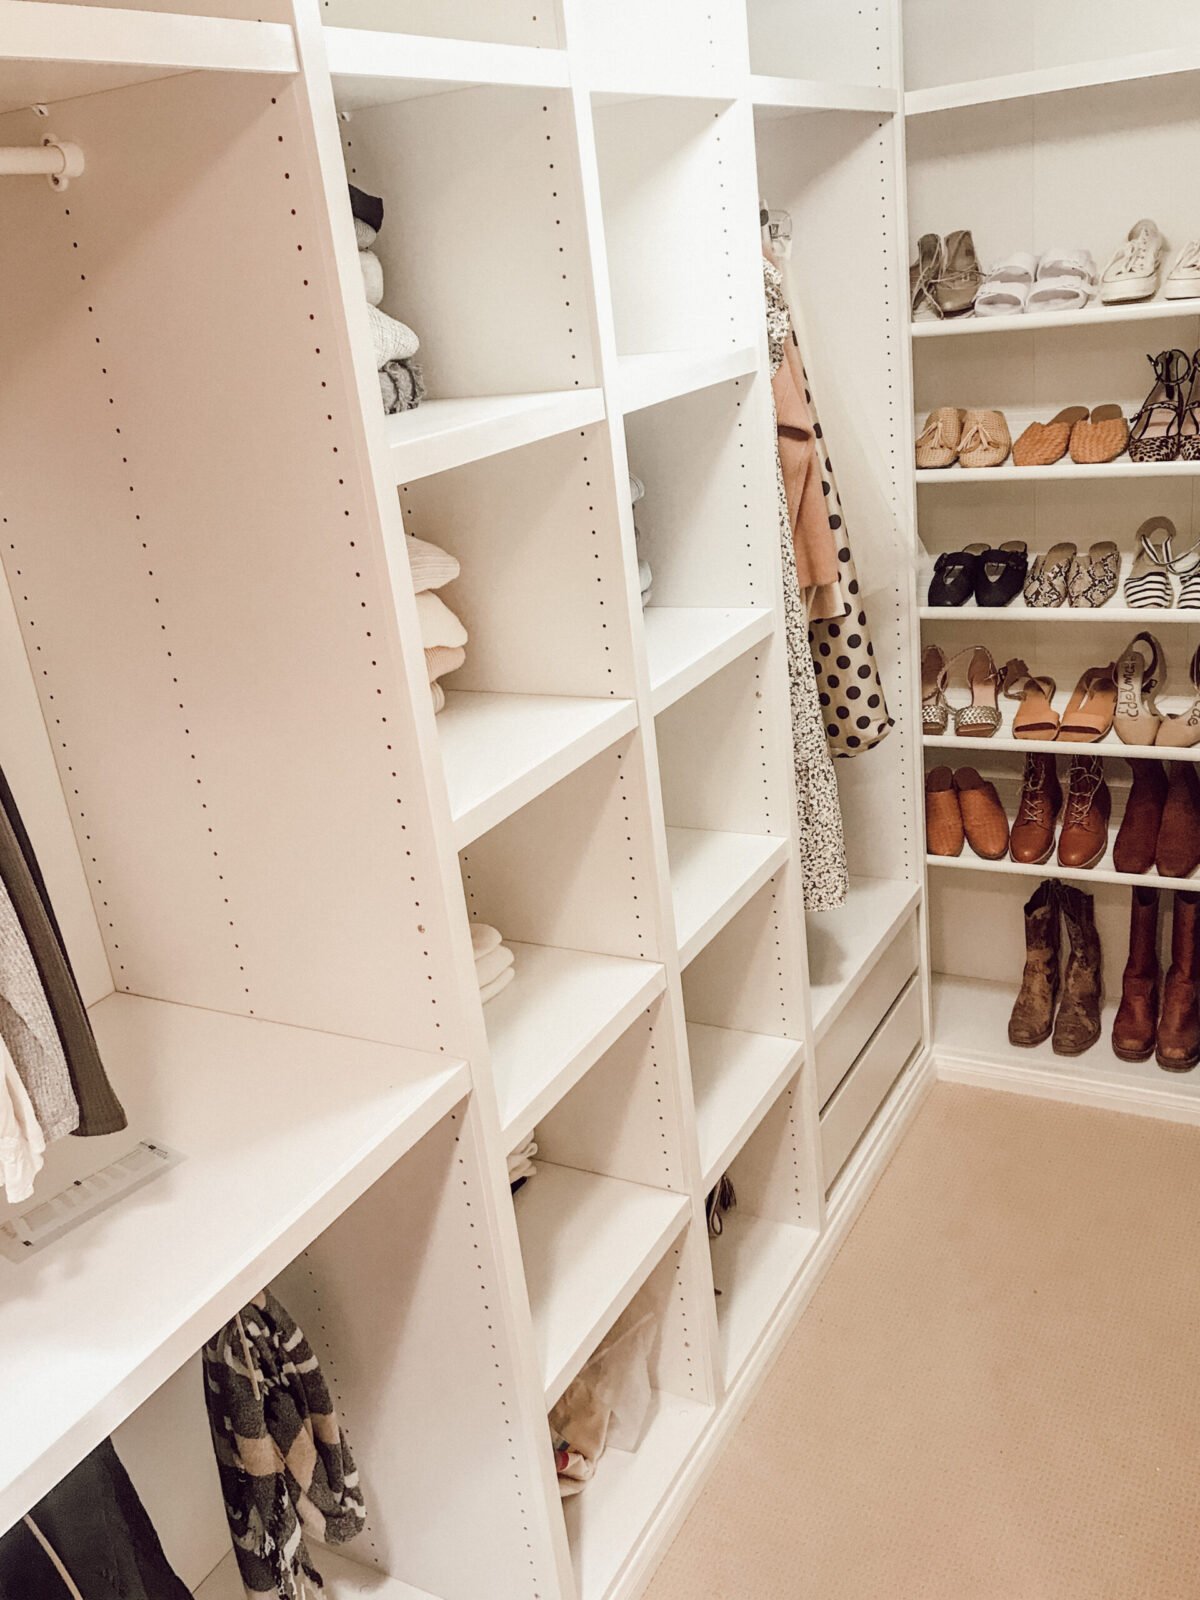
lots of cubbies for jean, sweater, pant, and purse storage, a section to hang longer items like dresses, overalls, and coats, a split hanging section for blouses and skirts, and finally -my ultimate shoe display. we also included a few drawers near the bottom for accessories, and upper storage for hats and seasonal items.
as far as specifics go, we used ikea’s pax system for the wardrobe skeleton itself, and komplement pieces for shelving and drawers. S assembled everything as directed in the instructions (fun fact: he used to assemble ikea furniture for hire!). however, to give it a “finished” feel, he added framework and crown molding which he then painted white to match. the final result is nothing short of carrie bradshaw closet dreams. it may sound silly but i swear having my new closet makes me even more excited to get dressed everyday. because when your clothes are so beautifully displayed, you can’t help but want to wear them!
if you have any specific questions about the design or process, i would be happy to pass them along to my talented husband. in the meantime, please enjoy the before, during, and after photos of the entire project.
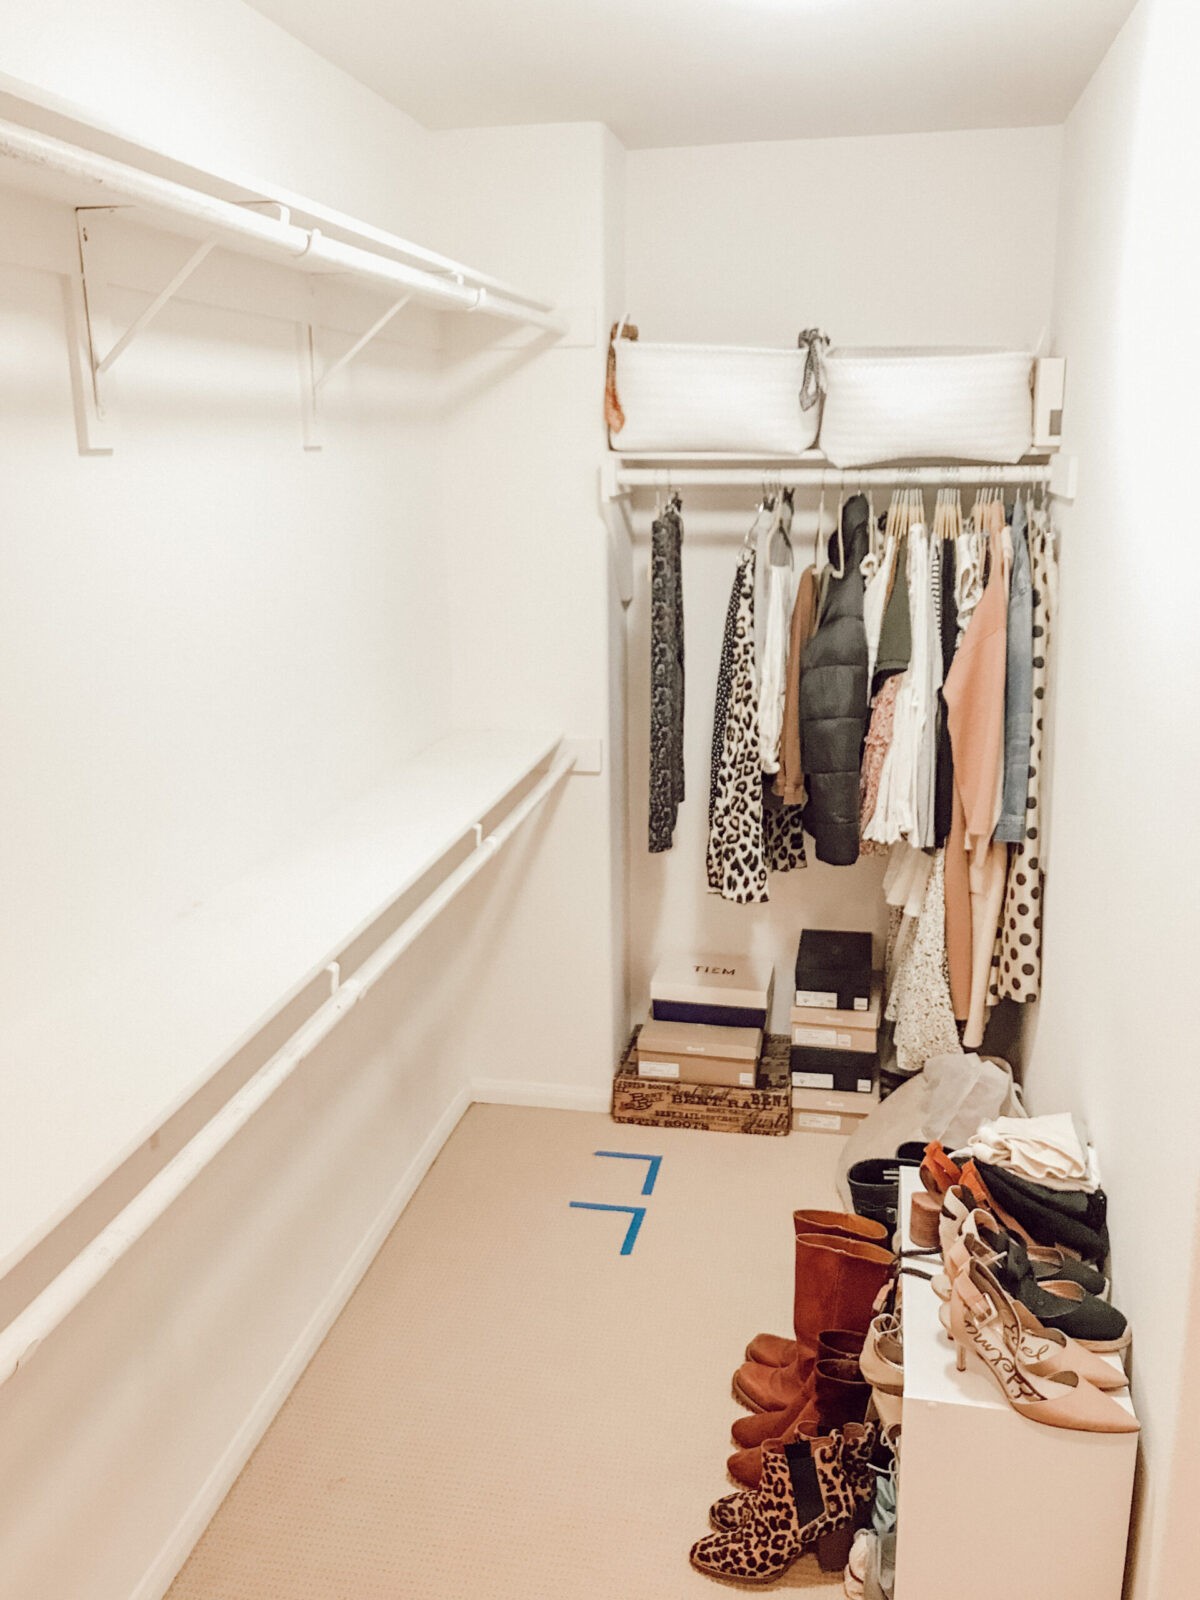
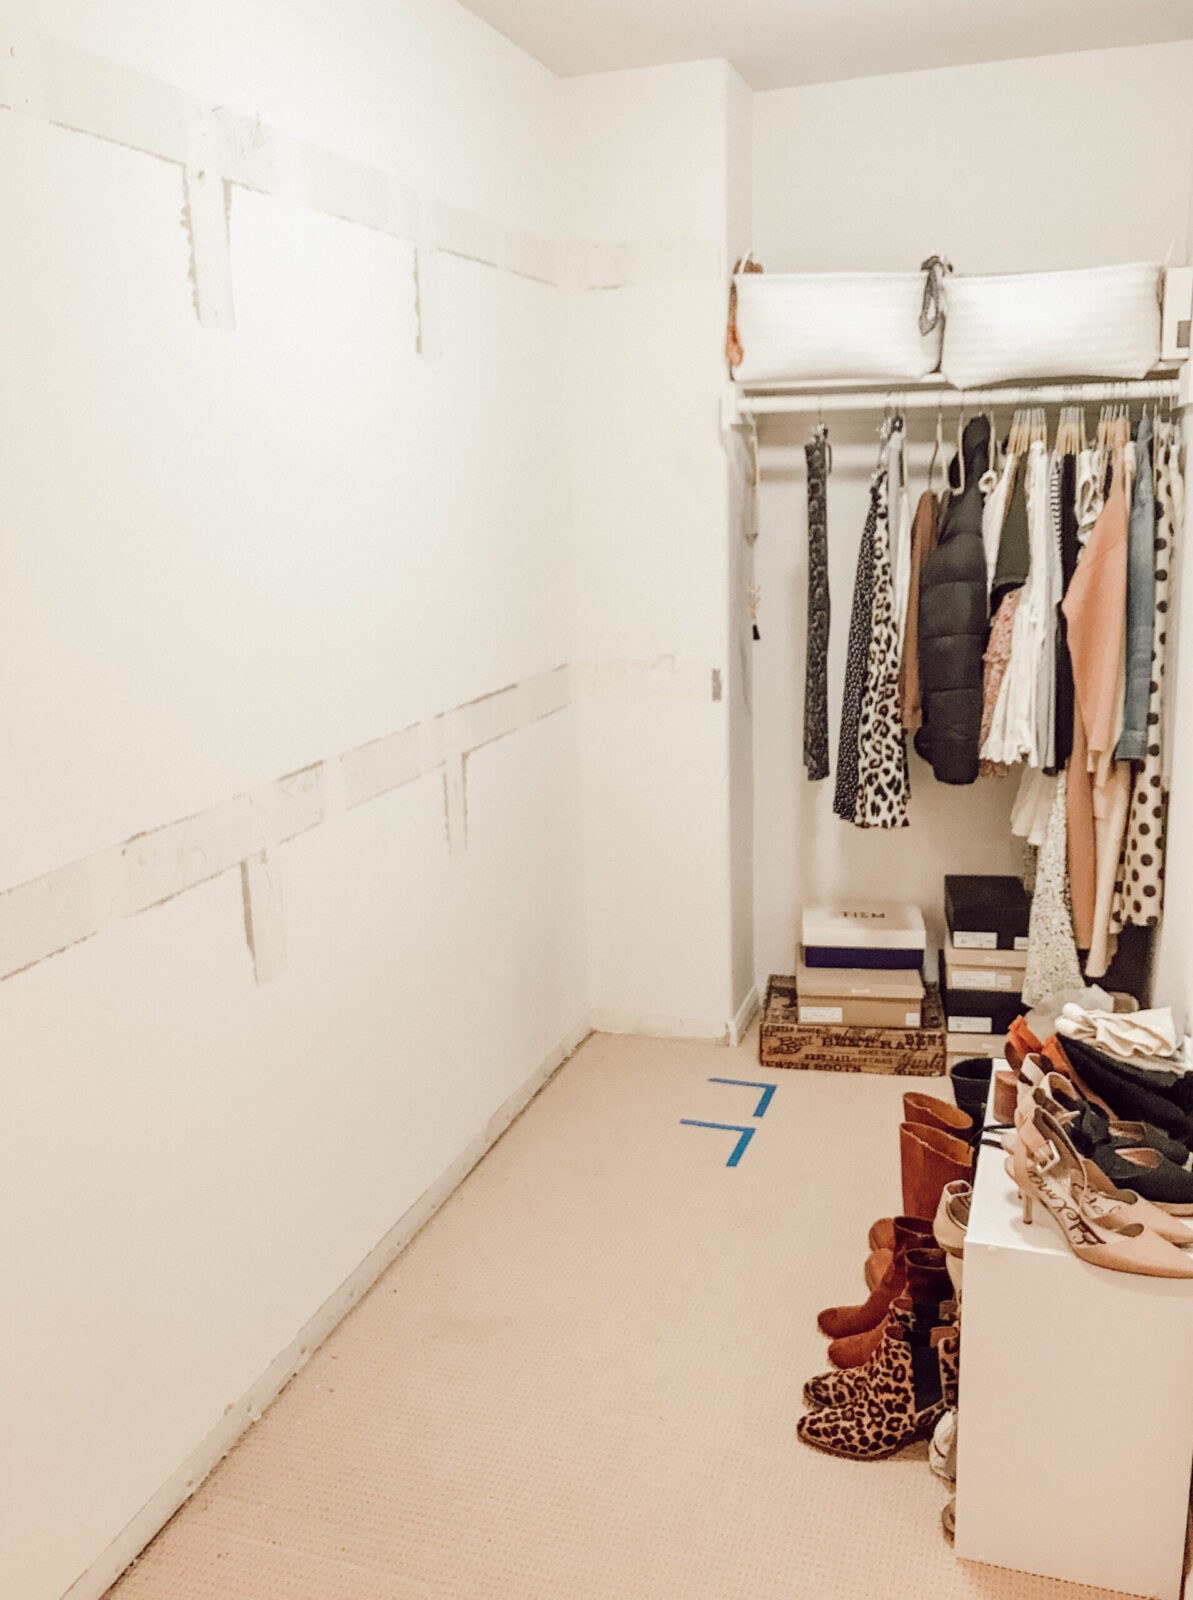
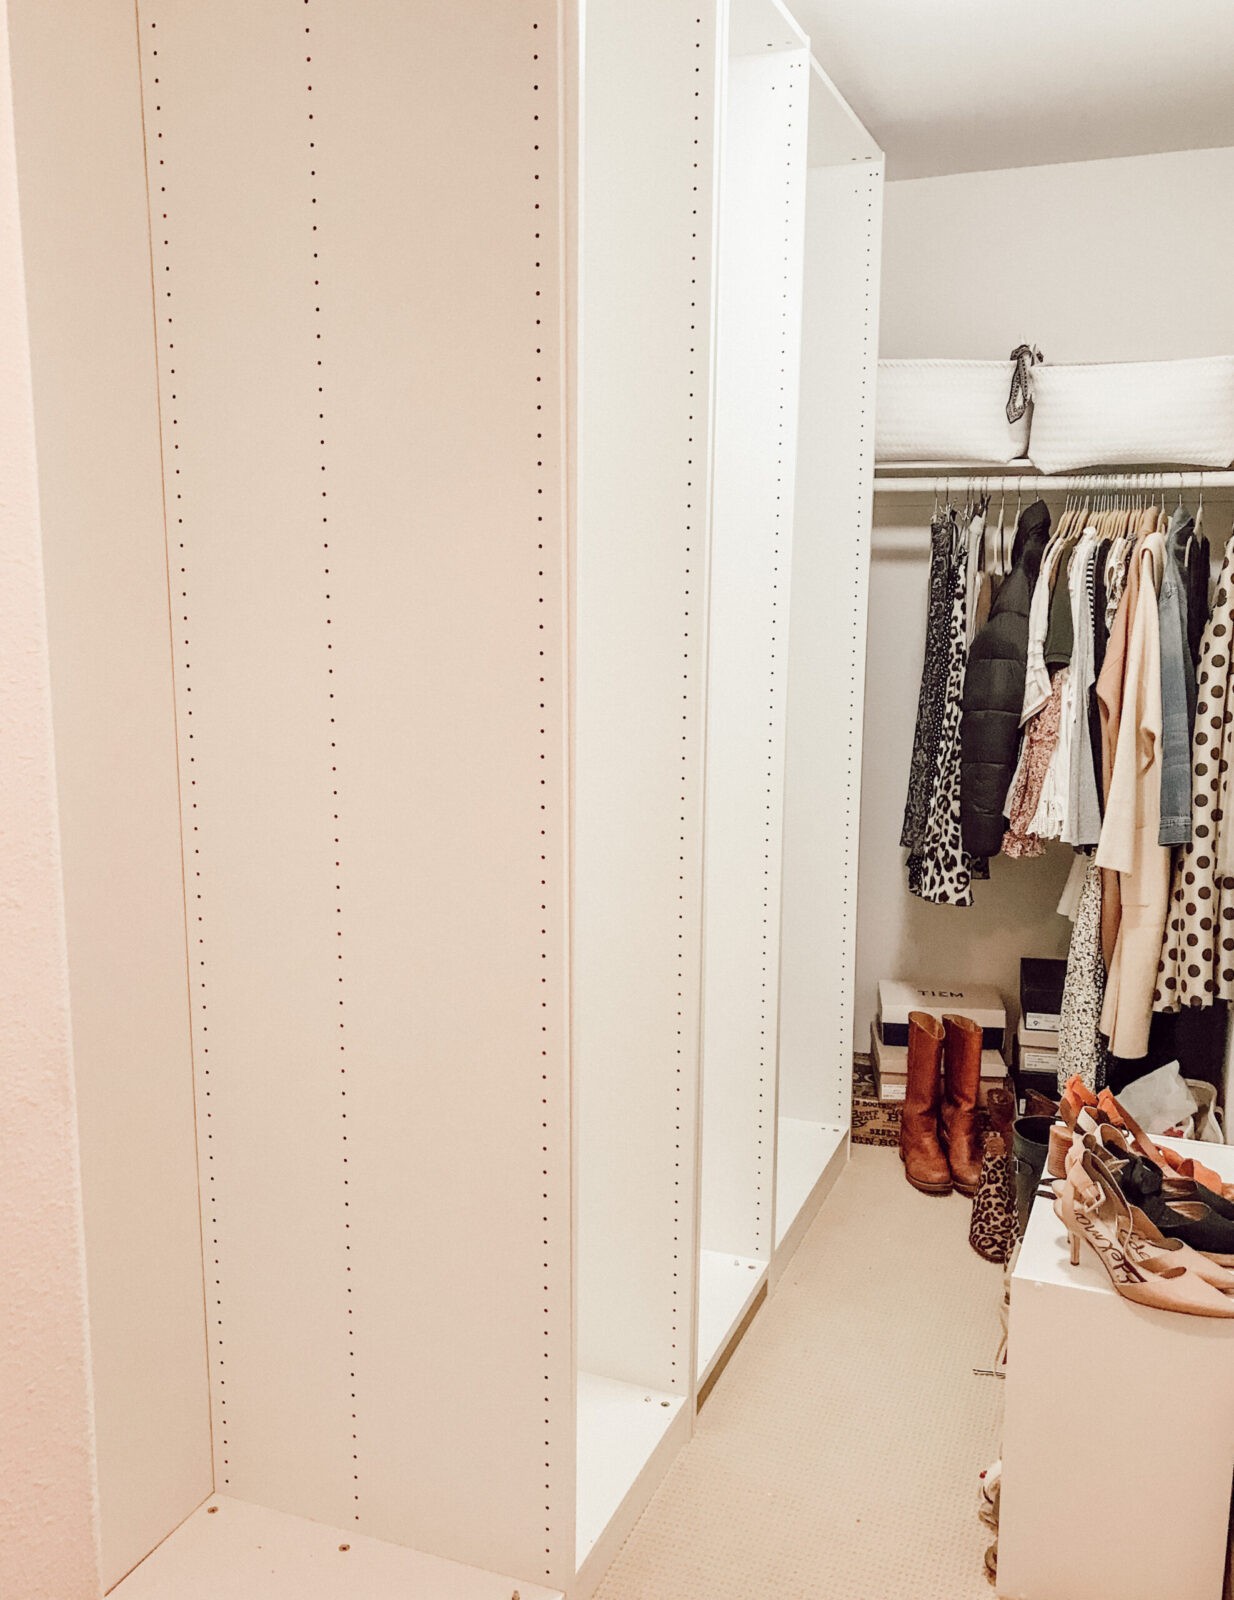
before:


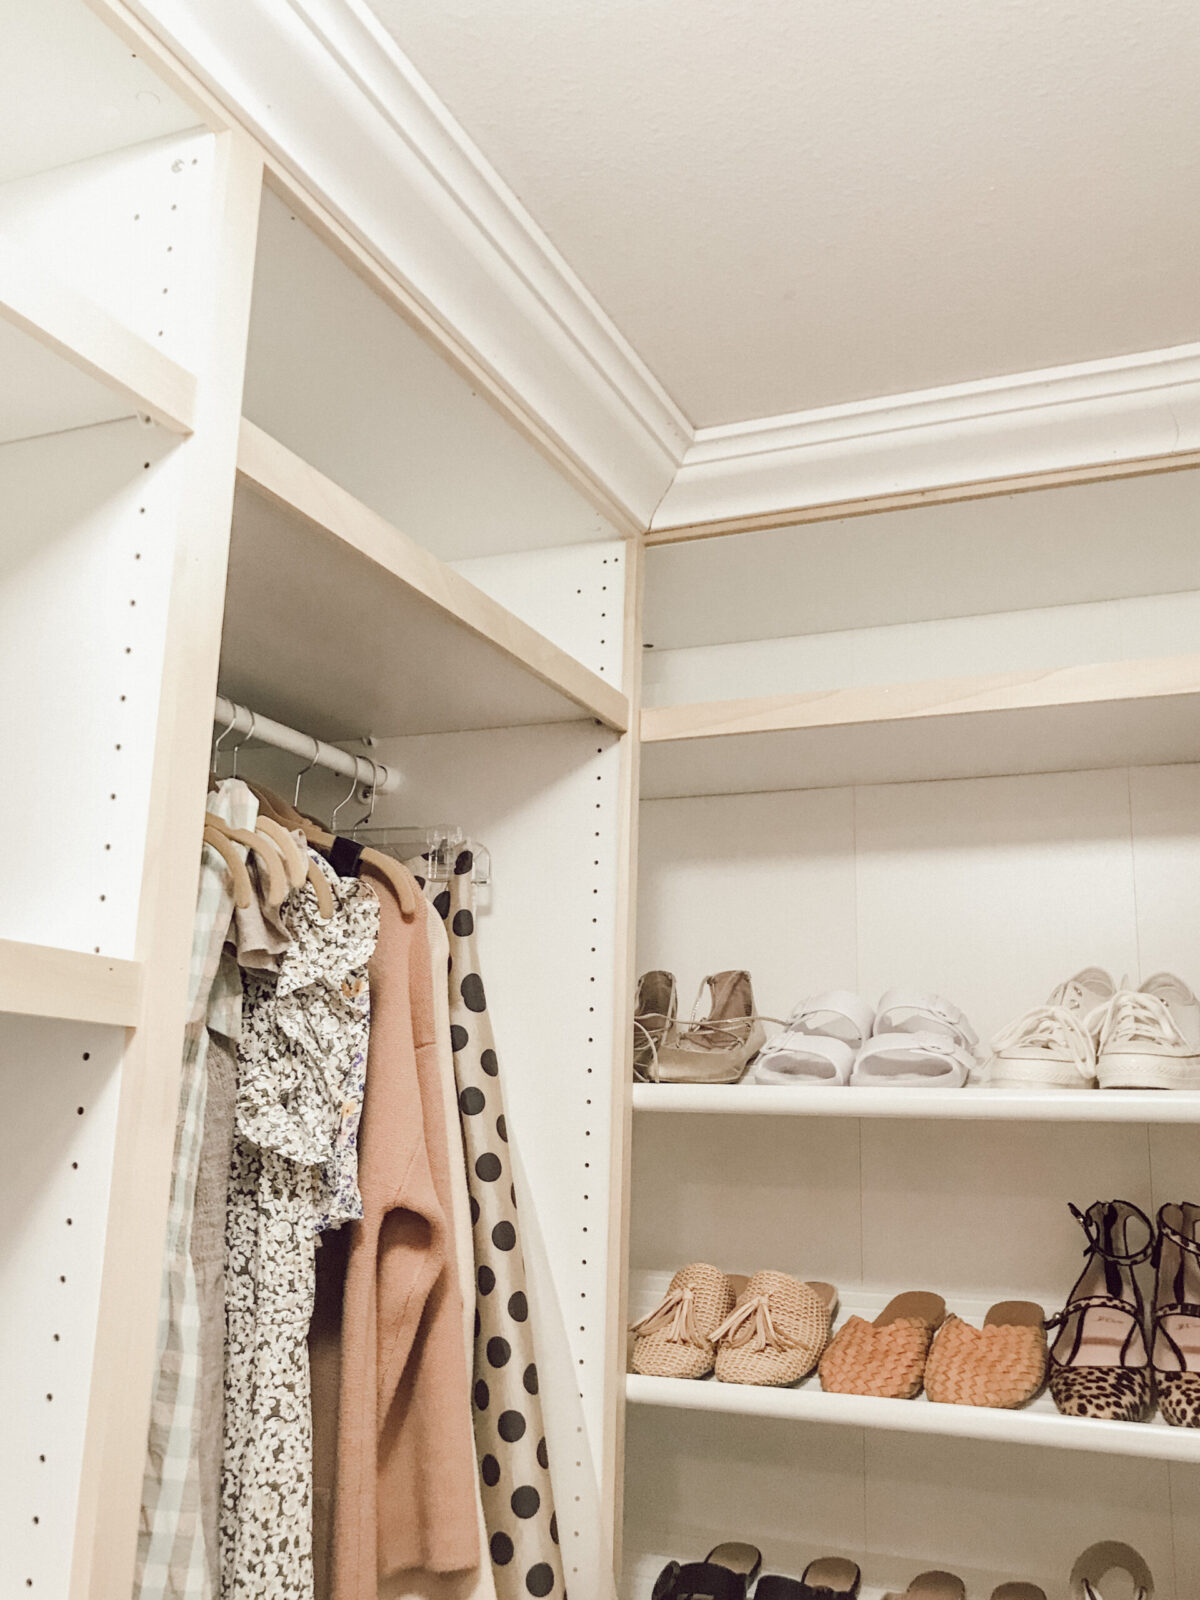
and the final product!
to see more, check out my reel on my instagram feed!
0